Friday, March 30, 2012

tomato and pepper up date...


 This is what makes gardening fun watching and hoping your seed is good and that you will get good germination. I planted my seeds in a seed starting mix called pro-mix Bx with Mycorrhizae. It is my favorite mix for tomato seedlings.


About half of the varieties are up and that is a good thing.lol I really have a hard time not checking on them every few minutes because that is all it takes and a few more are up.

   The pepper plants are doing great growing like a weed. I am excited to get a few Jamaican hot chocolate habanero peppers because I only had a few seeds left and I had eight germinate I was extremely happy with that.
    The mix I use to start my peppers is different it is the jiffy seed starter mix I have always had better luck with this mix on my peppers. Who knows why? But it is the one I use to start my peppers.


   Hope your seeds are popping up also see ya later Dusty....

Monday, March 26, 2012

Tomato seeds are in...


  Well after months of going over seed catalog's looking at the beautiful new tomato seeds for sale well all that Tomato Porn was getting to me. lol   The tomatoes are in there tray's.  I ended up with 55 varieties wow talk about restraint.


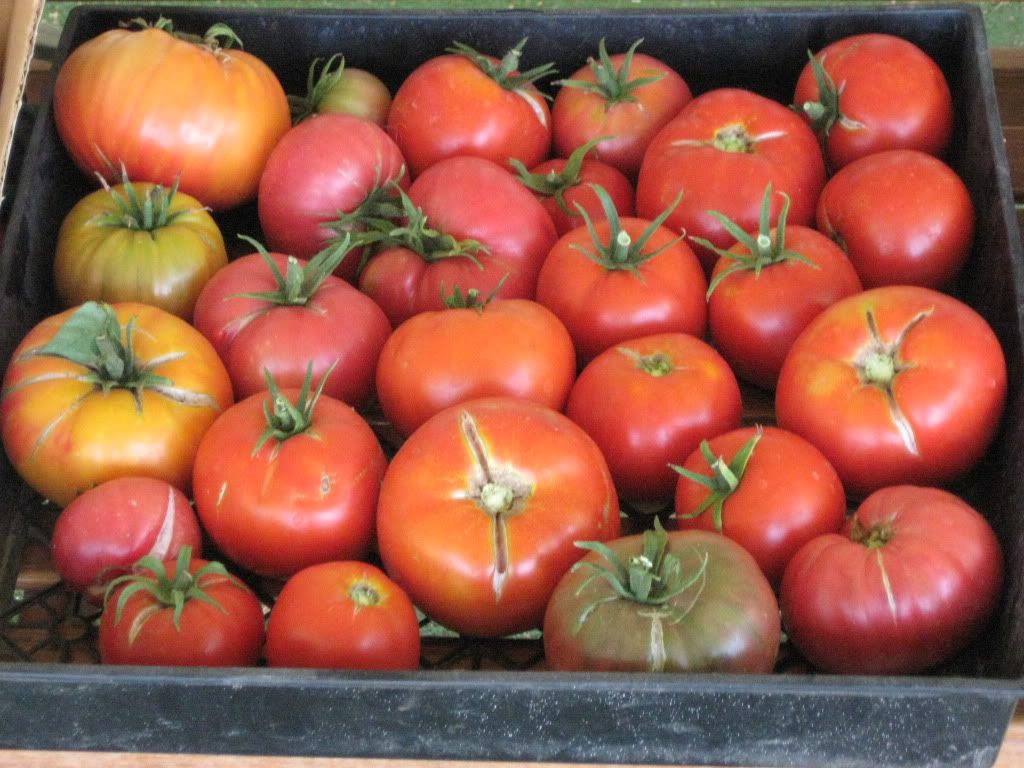
   Very exciting year for me there are a lot of tomatoes that I am really interested in. I am hoping to sell a lot of these at the farmers market and get some locals fired up on heirloom and open pollinated tomatoes.
  More photo's to come... later Dusty

Saturday, March 17, 2012

Jalapeno peppers Oh Yeah... were getting them started...with Azos


One thing we love in are house are peppers and the pepper we like best is the Jalapeno. We slice, smoke and grate them. They have a flavor that we just love.


 I like to scatter 6 to 8 seeds per hole and lightly cover with a seed starting mix.  As they germinate and grow I like to wait a week or two until the seedlings are just starting to form there true leafs at this point you have to divide them or just let them grow and cut out the ones you don't want later.


 I do use a root stimulator called Azos because peppers do not like there roots disturbed. I have found that Azos by xtreme-gardening works extremely well with pepper seedling and tomato seedlings. I loose very few and I am pretty rough on the pepper seedlings as I tear them apart and transplant them this is a very good product.
 On small scale growing of peppers I would suggest planting two to three seeds per tray and not disturbing them at all, but I need about a hundred jalapeno plants so this is the best method for me. I ended up with over 90 jalapeno plants I did plant other peppers as well a few bell peppers and fish peppers also a few purple jalapenos and about thirty banana peppers.
   My brother's family and mine bottle everything we grow and the favorite for the family is a pepper relish in this relish we throw all the different peppers we grow in the pot along with onions and garlic then grind it all up together and bottle it up yummy... There is nothing better on a hot dog for me than     Dusty's Pepper Relish...


Tomato transplants part 3


  This week I have re-pot a couple of tomatoes that I started a few weeks ago. I kept one of each variety a Stupice and a Chocolate Cherry and I plan to grow both of these out in containers for the upcoming season.


  In this container mix I used 25 percent perlite, 25 percent peat moss, 40 percent compost and 10 percent rock dust. The rock dust I will use today is a sifted granite which I purchased in bulk from a sand and rock company.
  I like to mix everything together and add water. I like to trim the bottom leaves off and keep them off the ground at all times it keeps the tomatoes from picking up diseases from the ground.


 This year I am going grow a lot more plants in containers or try to lol.  I plan to grow tomatoes, peppers and okra in containers this will be the first year for me trying to container grow okra so this should be fun....
 Later Dusty.....

Monday, March 12, 2012

Heirloom Tomatoes and Open Pollinated Tomatoes dominate this years selections for my garden

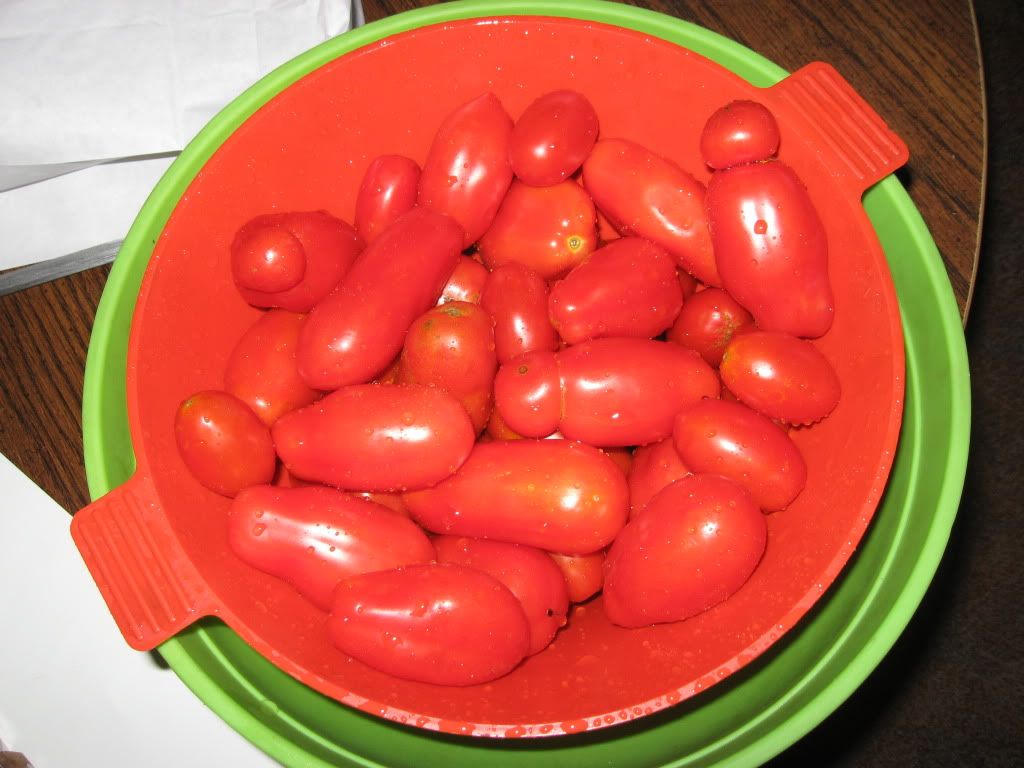
  I have been going over and over seed catalogs as well as conversations with other local gardeners on just what types and varieties of tomatoes I should bring to the local farmers market this year. After digesting information on this subject from locals as well as seasoned tomato market growers. I have decided to grow around 50 varieties but I am mainly going to concentrate on the smaller cherry tomatoes and the paste tomatoes.
  My research perimeters and areas I put in place brought me to this point. And they were ease of growth, earliness of harvest,  tomato varieties that could take a small ride without bursting. Then I had to think about packaging I found it easy enough to find pint containers. My idea is to sell tomatoes by the pint and quart just fill them up with any tomato variety and there will be a set price per pint and quart.
 As far as the paste tomatoes and larger varieties they also could be purchased the same but I am expecting to sell by the case or lug for the local bottlers at a more reasonable price for large purchases also for the tomatoes with blemishs. ( a lug of tomatoes is 32 pounds).
  The varieties I have chosen are mainly Cherry Tomatoes and Paste but there are a few larger types of tomatoes that I will grow. I believe I have 3 hybrids and the remaining tomatoes will be heirloom and open pollinated. I do have some crosses that I am growing out that should be interesting that I have picked up along the way from friends. I am hoping to have photos of lots of tomatoes this year.
  I am so excited to start this year. I broke my ankle Febuary 2nd and I have been running behind ever since but I am hoping the Doctor will let me start therapy on my leg so I can get things in the garden rolling. I will start planting my tomato seeds in the next couple of weeks so I have 6 to 8 weeks to get things in shape. lol
 The Cherry tomatoes I choose were from 1 to 3 oz   I will also have just about every color under the sun. If there is any interest I will post the names of each that I have chosen to plant this year...later Dusty...

Thursday, February 23, 2012

A Gardeners Journal

   A great piece of advice is to start a Gardeners Journal. If you haven't been doing this already it's time to start.
  Here are a few suggestions. Add a calendar to your journal it makes it easy to make notes here and there on a calender also do a ledger of what types of tomatoes, when you started them, when you transplant them, how many days did you harden your plants off. You can even keep track of money spent maybe keep a tab on your water bill.. always fun fun...lol


  Keep it up, write little notes like your first tomato what variety of tomato was it. Keeping track of the varieties and types of plants that do well in your garden this really helps. My garden journal helps me more each year it reminds me what has and has not done well for me and is a constant reminder not to get in a rush by planting to early or not to plant them until I have some wind protection for my seedlings. I have to protect my plants in the spring from the violent winds.


 So keep track of your types of seeds or plants that you purchase and your planting dates also when you fertilize and harvest... these are just a few things and I am sure there are hundreds of things you can track that can help you grow more food...until next time later Dusty....


 hey look my arugula and mizuna over wintered with zero protection. hmmm I better put that in my journal...

Tuesday, February 7, 2012

Popular Planting Mistakes

 I think the most popular mistake I see every year from the first time gardener to even the seasoned gardener is they forget to harden off there plants. The first thing everyone wants to do is get there plants home from the nursery take them and bang them straight into the ground a very huge mistake.
  Most plants that you are purchasing from the nursery have just been taken right out of a hot house. Nursery plants have been pampered and had perfect living conditions. What we need to do is toughen them up a little before we throw them out to the elements which would be direct sun, wind, and or cold any of these things could kill what looks like a perfectly good plant in one short afternoon.
  Seven to ten days is what it usually takes to harden off most plants to the elements. A slow and gentle hardening off period. I start by setting the plants in a protected area with the plants getting about an hour of direct sun light and in an area that will not get to cold or windy, if it is a little to cool outside at night I will bring them in the house. Next, I set them out for a little longer time in the direct sun not more than a hour longer and that is about all for this day. After I set them out for longer and longer periods I let them take a good breeze as long as it is not a hard breeze 10 to 15 mile per hour breeze at the most, while always protecting them from a freeze.
  My local last frost date is late in May so I would have to pay close attention if I were trying to set out frost sensitive plants like tomatoes or peppers at the end of may.
  After slowly hardening off your plants for 7 to 10 days it is time to plant. The evening before I plant I will water them real well the reason for this is that they come out of there containers much better and you have less of a chance for root shock. I like to plant the seedlings in the evenings or on a cloudy day its just less stress for the seedlings.
 Next, I dig a hole for the plant if it is a heavy feeder like tomatoes, cucumbers, watermelons, squash and such I will add a organic blended fertilizer about a half cup to a cup in the bottom of the hole and mix it up real good with the surrounding soil and try to put some soil between the fertilizer mix and the seedling.  Now take the seedling out of its container, once out of the container I apply Mycorrhaizae fungi You don't have to do this step but it really helps my plants. I use a powdered version of Mycorrhaizae fungi and I just sprinkle it on the exposed roots then about a half a tablespoon in the hole and place the plant right on top of the fungi and fill the hole up with soil then I like to water using a diluted seaweed fertilizer this is a very gentle fertilizer. Stake your plants now if your going to stake them.
  Now we just sit back relax. Ha-ha. That was a joke. For the next couple of weeks we are going to baby these seedlings and protect them from the wind and from the cold as well as we can. EZ WALL PLANT PROTECTORS  I can't tell you how much these help. The best thing you can do for your seedling is protect them. I can plant my tomatoes out 2 to 3 weeks earlier with the help of  EZ WALL PLANT PROTECTOR. They also protect my young seedlings from the wind. check them out at this link above.
  This is the point were the fun does start for me I love it when my plants are finally in. I am relieved now, I can start concentrate on a watering system. I am thinking a drip system with a timer . Its time to go to http://www.mrdrip.com/ whew im pooped...
 later,
 Dusty.

Wednesday, February 1, 2012

Just thought I would show you around my neck of the woods

 I thought about snapping a few pictures of the local area and give you an idea of the diversity in the area I call home...


This is a couple of pictures taken in the White Mountains of Arizona in the area of Pinetop.


 Here I am about an hour west of were I live on a cattle ranch looking towards the San Francisco Peaks
the city of Flagstaff  would be at the base of those mountains.

 An old wagon lay forgotten. Very nice wagon for the time I believe it was a newer version with rubber tires probably sold it the 1930 or later...


 This is the type of country I live in the High Desert.
 Lots of cattle ranches all over the area this one is by a town called St. Johns about an hour east south east.


Well this is Dusty River " The Little Colorado River" known to the locals as Dusty River....When it blows and blows hard the dust will rise hundreds of hundreds of feet in the sky... lol I can't wait..later Dusty
 shortly after posting this I snapped my ankle in two places what a crummy day. dang it

Sunday, January 15, 2012

How to Grow Tomatoes in Containers

       Today I was going through my tomato seeds it's that time of year to start thinking about what your garden plans are going to be for the upcoming season. To my amazement and utter astonishment; I found that I have accumulated more varieties of tomato seeds than I have garden to grow them. As I look at the number of tomato seeds I had to look again I double checked it but the numbers were there. I just don't have enough room in my garden to plant them all...
      DANG IT !!!! Well, what's a guy to do? WHAT IS A GUY TO DO!?! Well, let's see... I can use a plot at my brother's house for an additional thirty tomato plants. Okay, okay. That's good. No, no forty plants! He-he, even better! Yeah, much better! Okay, okay. About fifty here at my place, give or take a few. Okay, okay. OH CRAP, I am still in need of space for about fifty more tomatoes NOOOOO!!!!!!
    Has this ever happened to you? It happens to me every year...THE AGONY, THE AGONY. What am I going to DO!? Growing in containers works well in situation like this. You can plop a container here, there, and everywhere. Ha-ha. Picking tomatoes varieties that like to grow in containers can be difficult but here's what to look for. I usually look for a determinate tomato for containers. The reason behind this madness is determinate tomatoes are bred to grow to a determinate size and shape and there fruit usually comes ripe all at once or over a two to three week period. Some tomato varieties that tend to do well in containers are Early Girl Bush, Bush Goliath, Celebrity, Big Boy Bush, Roma VF hybrid;  hybrids have disease resistance bred into them, which is great for gardeners for their productivity and disease resistance.
 Heirloom varieties such as the San Marzano nano or bush variety  have done very well for me as has the Green Zebra. There are thousands of varieties of tomatoes, I am sure you have your favorites.
    Indeterminate tomato plants continue to grow all season long or until a final frost takes it's wonderful soul to the great tomato garden in the sky.  In areas where the extreme heat is the norm, that's when the heat incinerates the tomato plants to an intense sun scalding ash and finally an agonizing death. Okay, so let's garden!
  The indeterminate tomatoes that I select for container gardening are usually tough and hard to kill; types such as the Cherry tomato. The Cherry tomato thrives well in many conditions.The smaller fruited tomatoes do very well in containers there also usually the sweetest of all tomatoes. The Cherry tomato can be very aggressive growers and are amazingly tough plants.

   Some of the Cherry tomatoes I like are the Chocolate Cherry, Juliet hybrid, and the Sun Gold hybrid all have done well in my garden but just about any of the Cherry tomato varieties would work well, plus they are heavy producers so much, so you might have to cut them back during the year they grow extremely well.

  The placement of these containers for me will depend on the container's color. What we are trying to do is protect the roots of the plant so they do not get to hot. As summer strikes the heat can steam their roots. Dark containers absorb lots of heat, great in the spring, not so great during the summer. Morning sun and afternoon shade is the rule and still you might have to shade the containers with cloth or something else. Sometimes I just lean a pallet against the container just to give it a little shade.

    If you have no afternoon shade in your gardening area do what you can to shade them from the afternoon heat. I do like the idea of a dark barrel for spring it gathers the warmth to the soil; the tomatoes and peppers love it but when the summer heat comes try wrapping the dark container with something light in color like a fabric, light color burlap, or shade it.

    I use big containers mainly because I want to grow big plants and I can grow almost any variety whether it be a beef steak or a cherry tomato in a half drum, approximately twenty-five to thirty gallons. I also grow in smaller five gallon buckets and do fantastic but the varieties I can grow in the bigger containers, they're bigger and better.  Also, I don't have to water as often.  That is a Plus Plus.


 I start off with fifty-five gallon plastic barrels. I can find these around pretty often pretty cheap. I have never bought one myself.  I find them broken cracked and some people just give them to me to haul off, which is great I like the free pricing. I can be cheap. Ha-ha...


 Be careful now were going to cut these bad boys in half. I get my circular saw out and cut the drum in half. I then drill some holes in the bottom for drainage. I do the same for the other half of the barrel and we're done. We now have two containers. Now to find twenty-four more barrels. Remember always to keep your eyes peeled for containers you never know when you have more tomato plants then garden space. Five gallon buckets work great as containers for tomatoes too but make sure you drill holes in the bottom of your buckets to allow for drainage it is just so much easier to keep the soil moist in the bigger containers.

  A soil mix I suggest is approximately forty percent compost twenty five percent peat moss twenty five percent vermiculite 10 percent rock dust.

  I will be doing some Dwarf tomato varieties in five gallon containers this year. It should be a fun year coming up. As always later, see ya.. Dusty...

I know, I know those are pepper plants in the containers but they do well in containers as well.


Sunday, January 8, 2012

Germinating Tomato seeds part 2 a new beginning the transplant stage.

 I do this every time when I start doing my germination checks.  I can't bring myself to just toss the baby's out.


  I will grow these baby tomato plants out even though it is far to early for me to be doing so in my growing zone which is 5b,  I normally don't start my seeds here until the end of April for my outside garden.

  Here is a very easy way to transplant your baby tomato's.
First were going to take them out of the container. Next I will separate the individual plants. Trying not to damage the roots to bad. 
I just want to remind people to water there plants first before you do this step. If you notice I did not and I did loose several plants that I normally would not have.


Next  I get a bucket and fill it with potting mix and soak it real good. I then fill my containers about half full of the wet potting mix. I like to put a dash of Mycorrhaze fungi in during this step this is optional but I recommend it.


  Next we will fill them up with the potting mix and hey were done and  now  we have way to many tomatoes plants.lol
  If by some chance you damage the roots real bad during the separation process they will wilt over and pretty much look dead. What I do now is move them to a dark area for 48 hours and they seem to start rooting from there stem and they are perfectly good after 48 hours and you find the plants all shriveled up and looking dead then you will be correct there dead.
 A very easy thing to do, transplanting tomato seedlings its that simple.


 One important step to do right now before anything else yes that's right  label your tomatoes. Its the one thing I have a hard time remembering. I will transplant 4 to 5 variety's and after I am done I stand back and look at all my pretty little tomatoes and I can not identify one from the other. Slow down label your tomatoes. Oh and I am laughing too I miss spelled Stupice on the plants. oh well thats funny.

  I will keep this bunch in my plant stand for a few more weeks then transfer them to a bright area of the house until more can be done with them. Most will be given to friends in the Phoenix area I believe there in zone 9a and others will be given to a nursery and some will be saved for a cloning episode but that's another episode. Later Dusty......