Wednesday, February 1, 2012

Just thought I would show you around my neck of the woods

 I thought about snapping a few pictures of the local area and give you an idea of the diversity in the area I call home...


This is a couple of pictures taken in the White Mountains of Arizona in the area of Pinetop.


 Here I am about an hour west of were I live on a cattle ranch looking towards the San Francisco Peaks
the city of Flagstaff  would be at the base of those mountains.

 An old wagon lay forgotten. Very nice wagon for the time I believe it was a newer version with rubber tires probably sold it the 1930 or later...


 This is the type of country I live in the High Desert.
 Lots of cattle ranches all over the area this one is by a town called St. Johns about an hour east south east.


Well this is Dusty River " The Little Colorado River" known to the locals as Dusty River....When it blows and blows hard the dust will rise hundreds of hundreds of feet in the sky... lol I can't wait..later Dusty
 shortly after posting this I snapped my ankle in two places what a crummy day. dang it

Sunday, January 15, 2012

How to Grow Tomatoes in Containers

       Today I was going through my tomato seeds it's that time of year to start thinking about what your garden plans are going to be for the upcoming season. To my amazement and utter astonishment; I found that I have accumulated more varieties of tomato seeds than I have garden to grow them. As I look at the number of tomato seeds I had to look again I double checked it but the numbers were there. I just don't have enough room in my garden to plant them all...
      DANG IT !!!! Well, what's a guy to do? WHAT IS A GUY TO DO!?! Well, let's see... I can use a plot at my brother's house for an additional thirty tomato plants. Okay, okay. That's good. No, no forty plants! He-he, even better! Yeah, much better! Okay, okay. About fifty here at my place, give or take a few. Okay, okay. OH CRAP, I am still in need of space for about fifty more tomatoes NOOOOO!!!!!!
    Has this ever happened to you? It happens to me every year...THE AGONY, THE AGONY. What am I going to DO!? Growing in containers works well in situation like this. You can plop a container here, there, and everywhere. Ha-ha. Picking tomatoes varieties that like to grow in containers can be difficult but here's what to look for. I usually look for a determinate tomato for containers. The reason behind this madness is determinate tomatoes are bred to grow to a determinate size and shape and there fruit usually comes ripe all at once or over a two to three week period. Some tomato varieties that tend to do well in containers are Early Girl Bush, Bush Goliath, Celebrity, Big Boy Bush, Roma VF hybrid;  hybrids have disease resistance bred into them, which is great for gardeners for their productivity and disease resistance.
 Heirloom varieties such as the San Marzano nano or bush variety  have done very well for me as has the Green Zebra. There are thousands of varieties of tomatoes, I am sure you have your favorites.
    Indeterminate tomato plants continue to grow all season long or until a final frost takes it's wonderful soul to the great tomato garden in the sky.  In areas where the extreme heat is the norm, that's when the heat incinerates the tomato plants to an intense sun scalding ash and finally an agonizing death. Okay, so let's garden!
  The indeterminate tomatoes that I select for container gardening are usually tough and hard to kill; types such as the Cherry tomato. The Cherry tomato thrives well in many conditions.The smaller fruited tomatoes do very well in containers there also usually the sweetest of all tomatoes. The Cherry tomato can be very aggressive growers and are amazingly tough plants.

   Some of the Cherry tomatoes I like are the Chocolate Cherry, Juliet hybrid, and the Sun Gold hybrid all have done well in my garden but just about any of the Cherry tomato varieties would work well, plus they are heavy producers so much, so you might have to cut them back during the year they grow extremely well.

  The placement of these containers for me will depend on the container's color. What we are trying to do is protect the roots of the plant so they do not get to hot. As summer strikes the heat can steam their roots. Dark containers absorb lots of heat, great in the spring, not so great during the summer. Morning sun and afternoon shade is the rule and still you might have to shade the containers with cloth or something else. Sometimes I just lean a pallet against the container just to give it a little shade.

    If you have no afternoon shade in your gardening area do what you can to shade them from the afternoon heat. I do like the idea of a dark barrel for spring it gathers the warmth to the soil; the tomatoes and peppers love it but when the summer heat comes try wrapping the dark container with something light in color like a fabric, light color burlap, or shade it.

    I use big containers mainly because I want to grow big plants and I can grow almost any variety whether it be a beef steak or a cherry tomato in a half drum, approximately twenty-five to thirty gallons. I also grow in smaller five gallon buckets and do fantastic but the varieties I can grow in the bigger containers, they're bigger and better.  Also, I don't have to water as often.  That is a Plus Plus.


 I start off with fifty-five gallon plastic barrels. I can find these around pretty often pretty cheap. I have never bought one myself.  I find them broken cracked and some people just give them to me to haul off, which is great I like the free pricing. I can be cheap. Ha-ha...


 Be careful now were going to cut these bad boys in half. I get my circular saw out and cut the drum in half. I then drill some holes in the bottom for drainage. I do the same for the other half of the barrel and we're done. We now have two containers. Now to find twenty-four more barrels. Remember always to keep your eyes peeled for containers you never know when you have more tomato plants then garden space. Five gallon buckets work great as containers for tomatoes too but make sure you drill holes in the bottom of your buckets to allow for drainage it is just so much easier to keep the soil moist in the bigger containers.

  A soil mix I suggest is approximately forty percent compost twenty five percent peat moss twenty five percent vermiculite 10 percent rock dust.

  I will be doing some Dwarf tomato varieties in five gallon containers this year. It should be a fun year coming up. As always later, see ya.. Dusty...

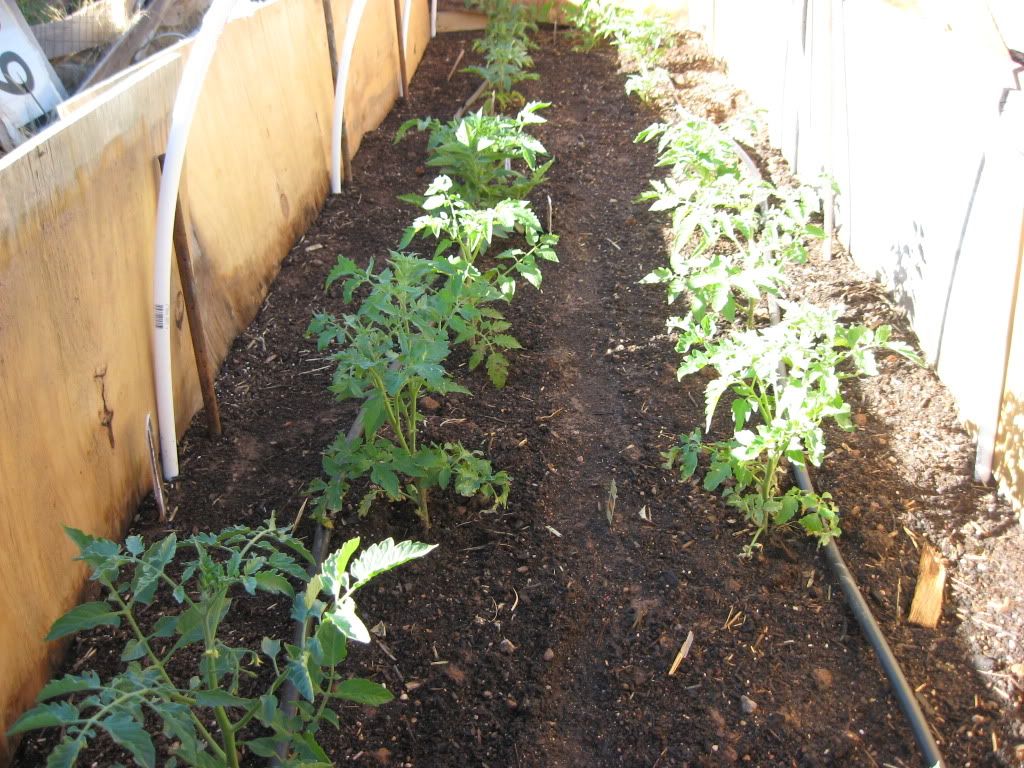
I know, I know those are pepper plants in the containers but they do well in containers as well.


Sunday, January 8, 2012

Germinating Tomato seeds part 2 a new beginning the transplant stage.

 I do this every time when I start doing my germination checks.  I can't bring myself to just toss the baby's out.


  I will grow these baby tomato plants out even though it is far to early for me to be doing so in my growing zone which is 5b,  I normally don't start my seeds here until the end of April for my outside garden.

  Here is a very easy way to transplant your baby tomato's.
First were going to take them out of the container. Next I will separate the individual plants. Trying not to damage the roots to bad. 
I just want to remind people to water there plants first before you do this step. If you notice I did not and I did loose several plants that I normally would not have.


Next  I get a bucket and fill it with potting mix and soak it real good. I then fill my containers about half full of the wet potting mix. I like to put a dash of Mycorrhaze fungi in during this step this is optional but I recommend it.


  Next we will fill them up with the potting mix and hey were done and  now  we have way to many tomatoes plants.lol
  If by some chance you damage the roots real bad during the separation process they will wilt over and pretty much look dead. What I do now is move them to a dark area for 48 hours and they seem to start rooting from there stem and they are perfectly good after 48 hours and you find the plants all shriveled up and looking dead then you will be correct there dead.
 A very easy thing to do, transplanting tomato seedlings its that simple.


 One important step to do right now before anything else yes that's right  label your tomatoes. Its the one thing I have a hard time remembering. I will transplant 4 to 5 variety's and after I am done I stand back and look at all my pretty little tomatoes and I can not identify one from the other. Slow down label your tomatoes. Oh and I am laughing too I miss spelled Stupice on the plants. oh well thats funny.

  I will keep this bunch in my plant stand for a few more weeks then transfer them to a bright area of the house until more can be done with them. Most will be given to friends in the Phoenix area I believe there in zone 9a and others will be given to a nursery and some will be saved for a cloning episode but that's another episode. Later Dusty......

Sunday, January 1, 2012

A Unique Garden

  As I walk around my brother's property, I am always surprised at the diversity of the plant life that he has been able to grow, and grow very successfully. As I walk the path I remember walking it with another brother of mine, my brother Jim, a very experienced gardener of succulents and cactus. As we walked and talked he would point out plants and tell me a story on how he and my brother Jay had started them or that he had sent those plants to Jay 15 years ago or more and how he was surprised that they were still alive because the plants had not been tough enough for Texas such an experienced succulant gardener as brother Jim to give Jay a two thumbs up is quite an accomplishment. Jim authors a blog http://toughplants.blogspot.com/  He lives in the Dallas, Texas area where its quite a bit hotter and the heat is more extreme than in Northern Arizona. One of the big surprises to Jim were the variety of plant life that Jay had accumulated it was a wonderful walk and another memorable day spent with my brothers.
  To start this walk of mine I go to the bottom of his property I follow a trail and I walk by a few apple trees then past his vegetable garden, I continue up the path past a cactus and succulent area that is a very rocky area with some old vintage signs lying around, and a skull from a cow laying in the cholla cactus some native pottery scattered about it's truly spectacular site. What a gift he has for laying out such a beautiful yard and such a pleasant walk
  Brother Jay lives not that far away from my own house in a very small community called Shumway, Arizona.  Shumway is 40 miles South of Holbrook about 10 miles north of Showlow Az and is almost a thousand foot higher in elevation than Holbrook at around 5700 ft.

 My big brother Jay has always had a talent for getting things to come together.  He has a talent for growing just about anything, and he has a talent in there placement. A talent I wish I had. The placement of objects whether it be a plant or a placard well, lets just say he has a great eye for what belongs.
 A walk through his yard can be a surprise around almost every corner. There are the native tree's, shrubs and succulents, anything from a cactus from Afghanistan to a California red wood.  A different look each time I pass through the gardens. The different blooms through out the year from the many cactus and succulents to the native flowers and bush's along the walk. It is an incredible journey and one that changes as the seasons do.

 Around his vegetable garden the first thing that strikes me as you know being kind of different is the chicken coop. Over the years he has trained a few apple trees to grow around his chicken coop it looks amazing every year it looks better and better.


 There is a path that leads to a pond as you walk toward the pond a rocky outcrop filled with cactus and succulents and native plants follow you up the path. Very drought tolerant plants are the norm in this area. Oh yeah, there are fish in the pond, bass, catfish, sunfish as well and a dock. lol Good I might need to catch some dinner one day...


  It's a changing garden with variety's of flowers coming to bloom through out the spring, summer and fall. What a great pleasure for me to walk with my big brother Jay and hear him talk, you can hear the love he has for his family as well as the land. He has done such wonderful job on his property it looks nothing like it did when he started.
 A walk around his grounds is a unique experience.  No finer example of native plants from this area, have I seen anywhere.
 And yes my brother does a gorgeous vegetable garden too. You won't believe the size of squash plants he grows. But thats another story. I will be posting from Shumway Az and from my garden in Holbrook Az.
 Later from Dusty Gardens.

Sunday, December 25, 2011

Checking My Tomato Seeds For Germination part 1


  During the summer, I saved tomato seeds off of my plants that did well.  Here are a couple that I am testing for germination purposes.
 After collecting tomato seed from my non-hybrid tomatoes, I like to test a few to see how many germinate. I plant about 8-10 seeds of each variety that I collected during the summer, just to see how well they germinate.
 I fill up a couple of pots with peat moss and wet the peat moss down real good.  I count out 10 seeds and sprinkle them in the pots. Next, I sprinkle a light coating of peat moss right over the seeds about the depth of a half of a eraser on a pencil. Then, I get a water sprayer and mist it till the top is wet. I then cover it with saran wrap until the seeds start to germinate. Usually 3 to 4 days.  I usually have a excellent germination rate much better than the tomato seeds I get from the stores, who would have thought.
 I tell people that are starting to save seed to pick your nicest tomatoes for this and let them vine ripen until they are almost squishy,  maybe not that bad but you know let them get dead ripe. Always save the best tomatoes for this. It keeps your line of that tomato the very best. 
 There are two variety's that I am checking right now. One is a old favorite of a lot of gardeners. Stupice Tomato it is a very early tomato its origination is from Czechoslovakia. A cold-tolerant tomato that bears an abundance of sweet, flavorful 2 to 3 inch tomatoes.
 The next tomato has got to be one of my all time favorites it has been the most  aggressive and productive plant that I  have had since I started growing them it is the Chocolate Cherry. 
 The History of the Chocolate Cherry.  It was developed by Aaron Whaley, of Seed Savers Exchange   http://www.seedsavers.org/. He was trying to develop a tomato superior to the Black Cherry tomato more uniform tomatoes and keeping there great taste. Well I think he did beautifully the Chocolate cherry is a wonderful tomato great old fashion taste. If you like the taste of an old fashion tomato in the cherry size this is it. 

 I get more tomato for the buck with this tomato, I would suggest the Chocolate Cherry for anyone's garden.
 Oh yeah, 100% germination for both, I am so happy that's what it's about....

Monday, December 19, 2011

After the thaw

Thyme


    Just a peek at the garden after a thaw. We had a winter storm that dumped about a foot and a half of snow in my yard. It was a little early for such a snow. It's not unusual to get snow here in Northern Arizona but in our area we are more use to four or five inches at a time, up the road a few miles they measure snow in feet and they can keep it.


   It's always so amazing to see the Shallots they love cold weather so much, it seems to me like they never look better than right after a foot of two of snow has just melted off of them.
 The Garlic looks like it took it rough but in a day or two they will look great to and come spring they will really kick-it in gear.

  And there is nothing like a carrot after a few freezes they are so sweet.

Monday, December 12, 2011

How to make home made Horseradish sauce

  As the time gets closer to Christmas and New Years people are starting to prepare for the annual celebration of THE BEEF "Prime Rib". That also means it is time for the real star of the show The Horseradish Sauce. This is the simplest of recipes for great tasting horseradish.
  This is what will set you apart from the wannabes. When you stick that awesome chunk of prime rib on the table and then you whip out that freshly made Horseradish sauce batabingbataboom you are a rock star baby. Ha ha its all about the Horseradish.
 1st step- Horseradish root go ahead and peel the root and wash it.
 2nd step- You can use a food processor for large quantity's.  Grind the horseradish as fine as possible making sure to do this step outside. The fumes could overcome you if you do this step indoors. This is a warning....
 For a smaller batch's I would recommend a zester, I like to use a orange zester and zest up the horseradish with it. I like this method because I can do it indoors and do small amounts as needed.
 3rd step- The most important step. Is to grind or zest up the horseradish and then just let it set out for 3 to 4 minutes just airing itself out. It actually makes it hotter!
 4th step- Next put the processed horseradish in a container and add white distilled vinegar and thats it. If you do not want the horseradish as strong you add the vinegar immediately after grinding or zesting.
 I like to make this within an hour or two before the meal. The fresher the hotter.

 You can mix your freshly ground horseradish with Jelly's and Jam's to make outstanding shrimp dips.

 Cocktail sauces are amazing with fresh horseradish 2 tbsp or more hehehe of horseradish about 6 tbsp of catsup a splash of worcestershire a little lime or lemon juice and then just a touch of brown sugar then mix. Let the mixture rest for 15 minutes. Real basic real easy.
 You can store horseradish root in your refrigerator for several months. Keep it in a zip lock bag for storage.
 As for the faint of heart you can add either mayonnaise or sour cream to cut the strength 1 part horseradish 2 parts mayonnaise or sour cream. However this is not a recommend. So pull up your big boy panties and man up.
  See you again soon from dustyrivergardens....

Friday, December 9, 2011

San Marzano, the ultimate paste Tomato? hmmm

 Ha ha those might be fighting words but I like this tomato. My search for the perfect paste tomato came to a sudden halt two years ago.
  I like to investigate what kinds of vegetables that I want to grow for the up coming season. The internet is a valuable tool for this. In this search I was looking for the perfect paste tomato one that would grow in my climate and one that has great taste. I did come up with a few names that were promising but one name keep coming up and coming up more often then any other, it was the San Marzano tomato. This tomato it originates from Italy. The San Marzano is an Italian plume tomato roma type built for making the best sauces in the world.
  The San Marzano grew fantastic for me. I planted 8 plants 4 were a determinate and 4 indeterminate. A determinate tomato usually flushes with all there tomatoes becoming ripe within a 2 week period "great for home bottling" they also tend not to get as large and sprawling as an indeterminate. I did make sure that I had plenty of ground up volcanic rock in the soil "rock dust" this particular variety is said to taste and grow well in the volcanic dust. I think this is were it gets it's outstanding flavor.
   I found that the San Marzano was not only the most popular paste tomato by far, but for Italian cooks and chefs alike there is a fanatical following. They absolutely love this tomato. 
 I had the opportunity to bottle a few cases of the San Marzano tomatoes. I made some into a simple marinara sauce. It is basically garlic, olive oil and basil. It was outstanding. Next I made a tomato sauce a  "bolognese sauce" which is garlic, olive oil some carrots, celery and onions cooked down with the tomatoes. Simmering them down with a couple of bay leafs until the right thickness is achieved a recipe I did get off the internet at  foodnetwork one of Giada De Laurentiis recipes. After hours cooking them down the taste was everything I wanted a keeper for sure.
 Wow heaven on earth. I absolutely love the San Marzano flavor. I ended up finding a recipe for pizza sauce and a bold steak sauce recipe aka catsup. Yum.
 My problem has always been, my garden is not big enough for all the tomato variety's that I want to grow. So a garden plan is always on the agenda.  Tops on the list of things to do in the winter is come up with a garden plan and this year I am calling for at least 20 San Marzano tomato plants this will give me enough tomatoes for my personal canning a few left over for family and very close friends. My other variety's will consist of old favorites and some new variety's just for fun.
 I do highly recommend the San Marzano tomato for canning a two thumbs up from this garden guy. I even have my brother planting it at his house lol they are such a good tomato. Fresh or bottled this little tomato is big on taste...This year I am growing several more paste tomatoes including 4 types of San Marzano's we will see if the San Marzano will stay on top or will the Opalka or the Striped Roman can knock him off the top.
  until next time good gardening later from Dusty River Gardens.

Friday, December 2, 2011

Winter Has Arrived.


December 2nd and Snow has come to put a blanket over my beds of garlic. I am lucky I put a layer of compost and rock dust over my garden last weekend the garlic should love it....

Wednesday, November 30, 2011

Spring winds and planting your garden

  Spring time, were I live, can be hot one day with temperatures in the 90's, and then freezing the next day. Don't forget about the wind, 50 plus mph all day gusting to the 70s, that can uproot a plant or just rip every leaf off of it.  Springtime can really blow.
  The toll wind can take on your plants can be huge, it can set them back weeks and even kill them. My main concern is to try to set up my garden beds where I can give them a wind break in the spring.  I can do this in various ways, by making a hoop house out of PVC pipe then placing a cover over the PVC pipe and creating a mini green house, that really helps and is probably the best solution. It takes time money, effort and sometimes I am short on all of the above. So, a lot of the times I like to just lean pallets up against my garden beds. In doing so this will help break the wind, slowing it down a bit. I am just trying to keep the wind from whipping my plants to death.  It is a very easy solution and inexpensive.  Pallets can be found easily and most places of business give them away.
   Every year when spring starts a gardeners heart goes a twitter. My friends and neighbors start planting in the dirt and getting there gardens in the ground. Oh this should be good you say, but it generally ends up in decay and heart ache.
  There has been many a friend that tried to beat mother natures last frost date. It is not wise to try to fool with mother nature. Most of the folks I am speaking of have there tomatoes and peppers in the ground weeks to early. Our last freeze date in my area is May 28th and my good neighbors usually put there plants in two to three weeks before this. Sometimes they make it through with no freezes but with the cool nights the ground is still cold.The plants just will not grow until the ground warms up.
  Your tomatoes and peppers really need to go in the ground not after the last freeze but when the soil is warm enough for them to grow. You can help this by using something dark on the ground a cloth or a tarp. Something dark that will get hot during the daytime works well. Leave your ground cover in place for a good two weeks or more, this will help warm the ground. I usually plant the week after the last freeze date and I cover the ground for a few weeks before that to get the ground good and warm.
  That puts my garden a good three weeks behind my neighbors. By planting my tomatoes and peppers so much later you might think my plants will be behind and never catch up to my farming friends but no that is not generally the case, there plants have yet to grow.  I like to plant my tomatoes at around 8 weeks of age in a bed that has been warmed up a bit and protected from the wind. In a few weeks my plants will be larger than most of my farming buddies and that is how it will be for the rest of the year in most cases. My friends ask me where did I get those plants, they are miracle plants.
  In my experience with tomato and pepper plants is planting them when they are 6 to 9 weeks of age for my tomatoes and about 12 weeks old for my peppers.  When I plant them I want them in a warm spot protected from the harsh wind. As for my neighbors they planted their plants way too early, some did fair to good in the end most did not. Most froze the others were beaten to death from the wind. Most had to replant.
  I think a plant that just sits in a cold bed for weeks gets stunted. Between the wind and the cold it is just lucky for a plant to be alive let alone put out much as far as fruit after sitting in a cold bed for weeks.
  Do not get in to a rush.  I know your favorite nursery your Home Depot or Lowe's will have all your favorite tomatoes and peppers out early but sit down and tell yourself this. "Don't be stupid. Don't be Stupid. Don't be Stupid." again and again. Ha-ha. Good luck with that. PROTECT THEM.....